
DSD: Drapery 101
- Jul 26, 2017
- 2 min read
Drapery is one of those things that can be very tricky. What height do I hang them at? What style do I use? And how do I make them look anything but store bought? These are a few questions that we get all the time, which is why we decided to do this blog! Here are a few trick and tips that we learned through-out our design career.
Step One: Choose a style
There are so many styles to choose from but the right one is what matches the style of your personality as well as your surrounding space.
For a more traditional look, maybe you choose a pinch pleat or goblet pleat like these:


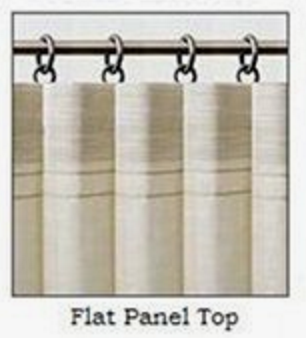
For a modern look, maybe you go with a flat panel or ripplefold, like these:


Step 2: Choosing fabric and uniqueness
Making your draperies unique is actually easier than you think. You can choose any drapable fabric that fits your needs. Take into consideration where the drapes will be use. Will you need them to be stain resistant, fade proof, or durable? Most likely, the answer is yes! Most poly blends do well as drapery for these reasons. Now add that designer touch! Give your drapes a little trim whether that be a fringe, tape, or pom poms, it will stand against any other. Take a look at the following ideas:


Design credit: madcapcottage (left), Del Sur Designs (right)
Step 3: Installing a rod
You always want to make sure that you extend your rod anywhere from 6" to 24" from the window depending on how much room you have and how large your windows are. For a smaller window 6" will be enough, but for a large window, you should consider 12-24" on each side for the rod. Then consider where to hang the rod. The rod should be hung at least 1/2 the distance from the window to the ceiling or 1/4 down from the ceiling. A good point of reference is often closest to the crown moulding as possible. Take a look at these beautiful examples for reference.


Design Credit: Laurel Home (left), Brooke Wagner Design (middle), Design Indulgence (right)
Step 4: Measure Length and width
You will want to measure from the rod down to the floor, but make sure you deduct 1-1/2" for the drapery to skim the ground or you can add 2-3" for a light puddling. This is based on your personal preference, we don't believe any way is wrong. Next, you'll measure the entire width of the rod excluding the finials or caps. Half of your measurement will be the width of one drapery panel.
Step 5: Account for Fullness
This is one mistake that we see a lot of people make. In order to make your draperies "full" and luscious you'll want to account for fullness. This means that you will want to multiple the width you just measured by 1.8 to 2 times. The will add additional fabric to your drapery giving it that designer look. In addition, always line your drapery (unless sheer), it'll give you a little extra fullness too.
Step 6: Enjoy you're beautiful drapery!


Comments